In Nutanix Community Edition there are two ways to deploy a Prism Central. You can either grab a tar and metadata files from the forum and upload them to the cluster GUI or use cluster interface for an automated download and installation from the internet.
In both cases PC gets deployed inside of Nutanix cluster as yet another VM. As I’m running a nested 3-node Nutanix cluster that spins on top of ESXi, I decided that it wouldn’t be optimal to run Prism Central inside of this nested environment. My choice would be to have it as a separate ESXi VM. Unfortunately, Community Edition doesn’t offer an OVA deployment option for Prism Central which is currently available for the paid version only. This means that we’ll have to experiment.
First, I have downloaded ce-pc-deploy-2020.09.16.tar that contains two files:
- ce-2020.09.16-stable-pc-boot.qcow2
- ce-2020.09.16-stable-pc-home.qcow2
These are two disks in the format that requires a couple of conversions to be compatible with ESXi. I transferred these files to Ubuntu 20.04 VM, installed the conversion tool and converted them to VMware Workstation format with the following commands:
sudo apt install qemu qemu-utils
qemu-img convert -f qcow2 ce-2020.09.16-stable-pc-home.qcow2 -O vmdk ce-2020.09.16-stable-pc-home.vmdk
qemu-img convert -f qcow2 ce-2020.09.16-stable-pc-boot.qcow2 -O vmdk ce-2020.09.16-stable-pc-boot.vmdk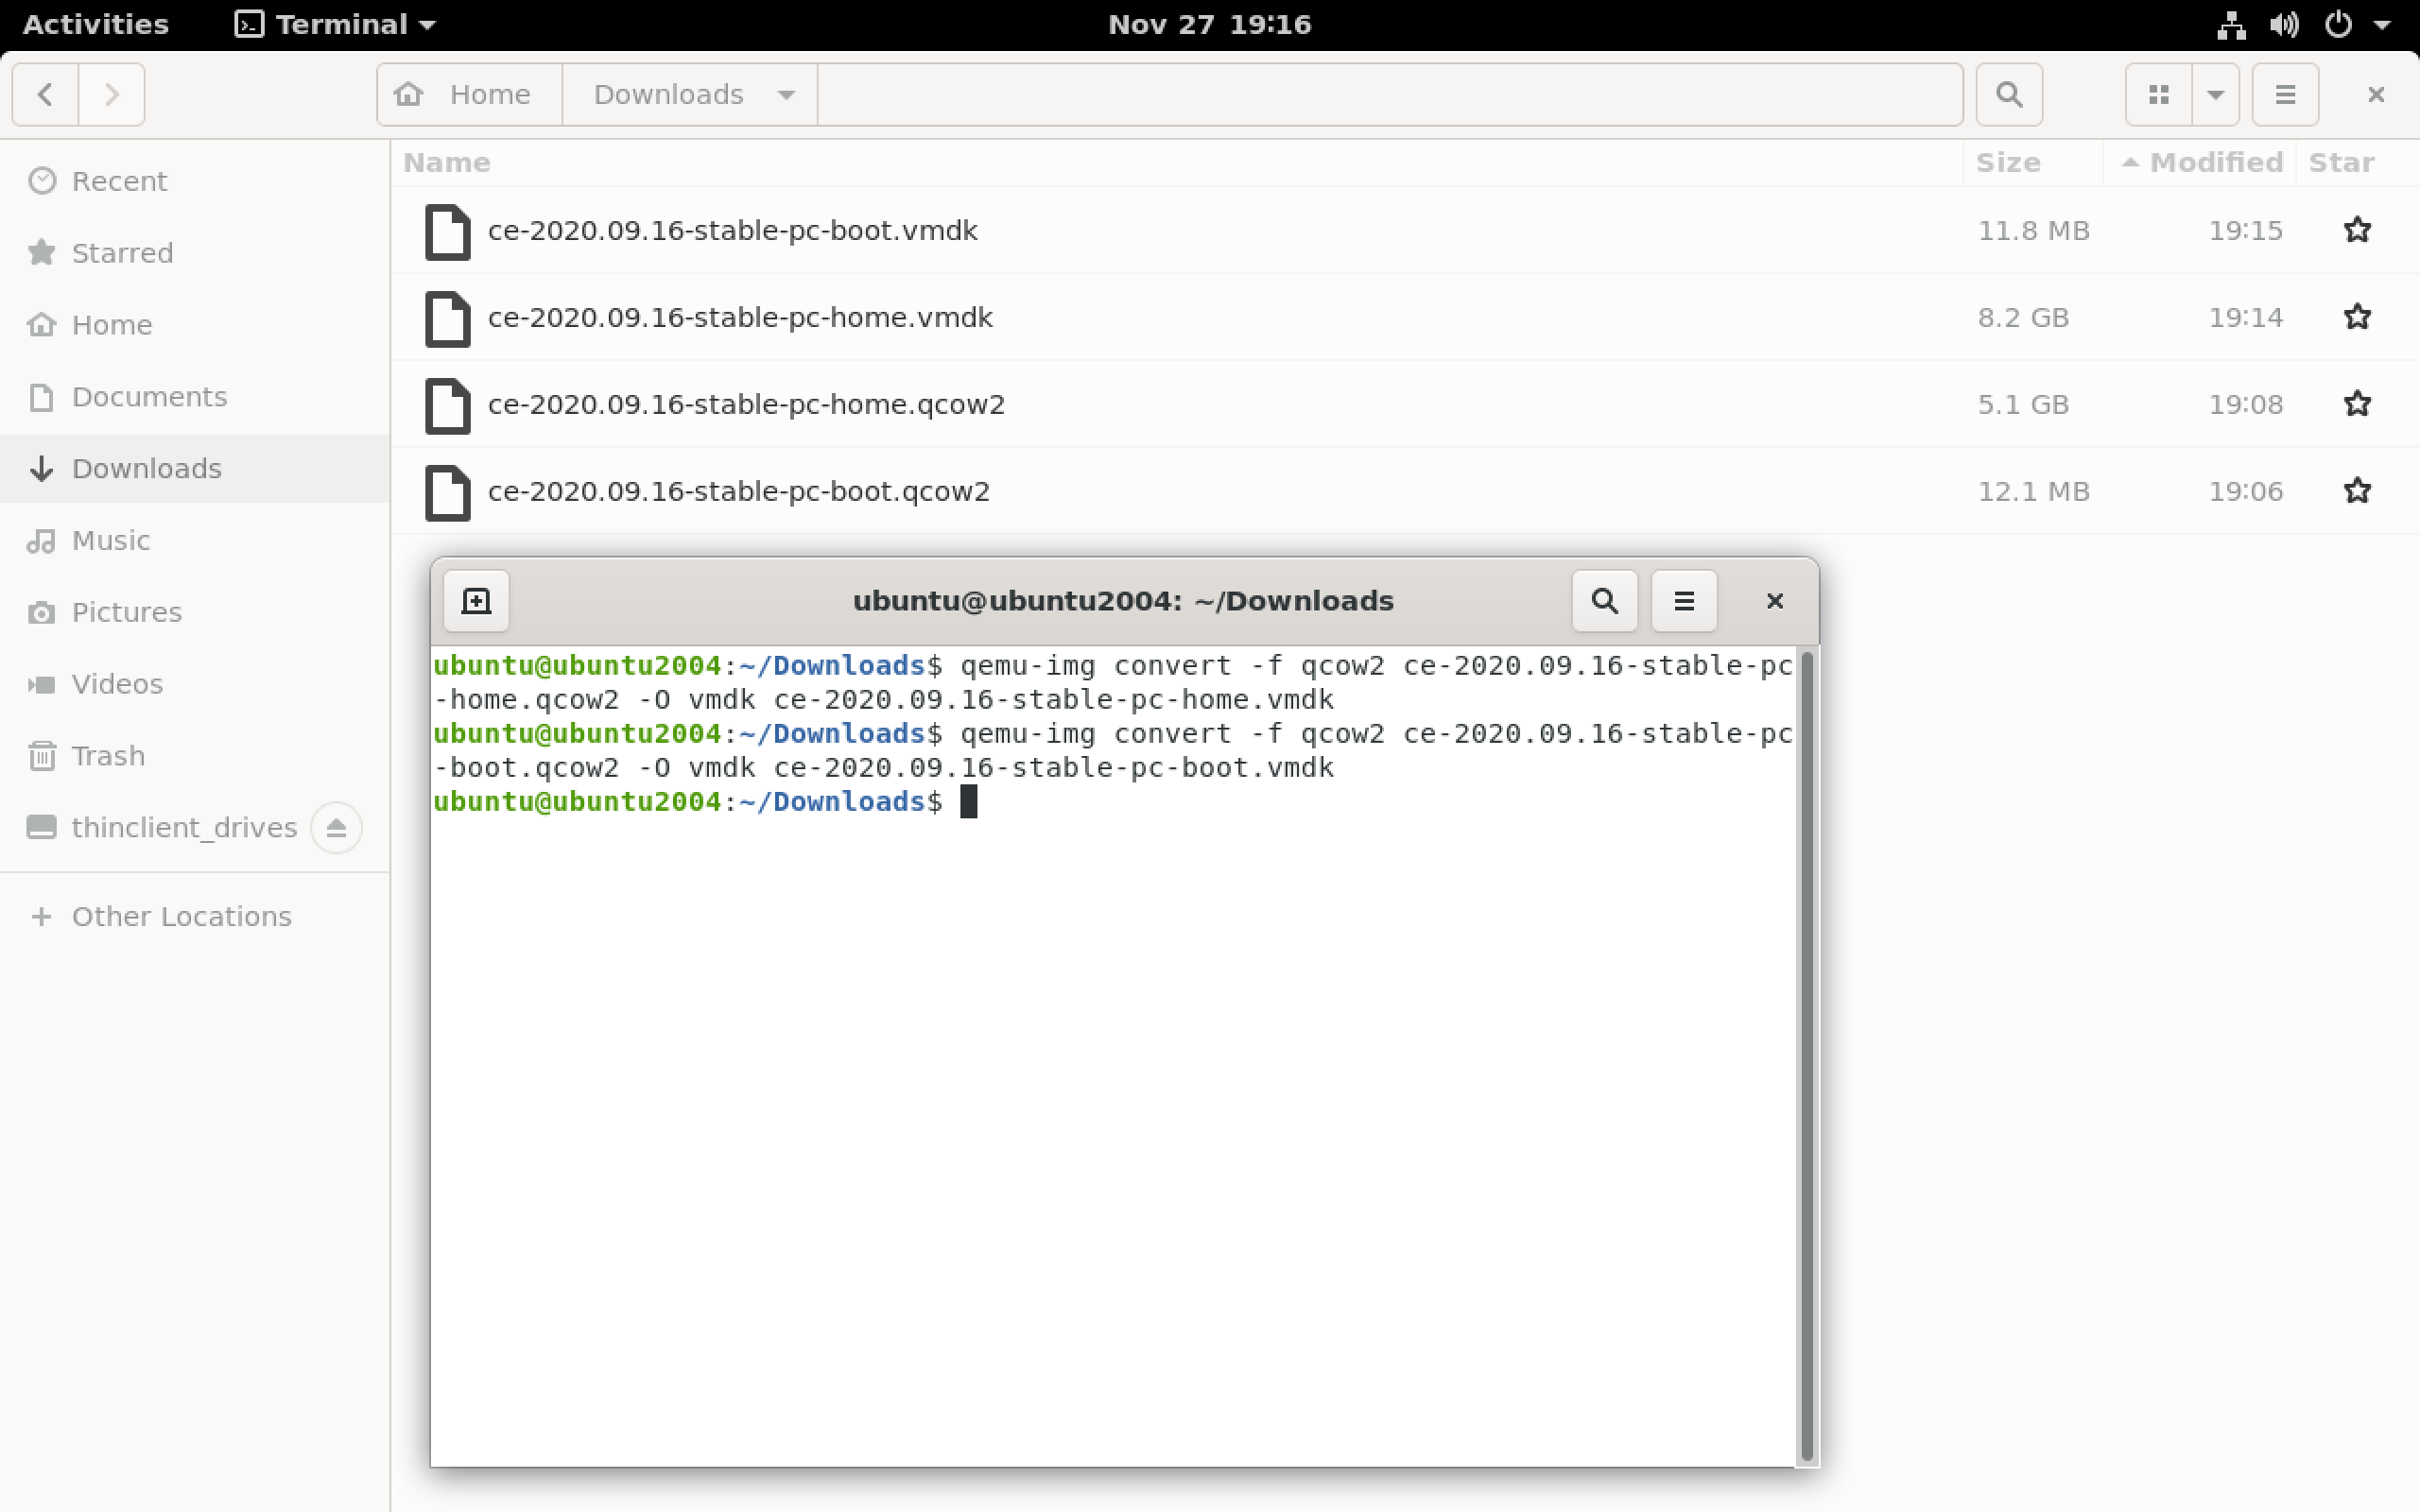
The resulting files will work in VMware Workstation but produce an error if you try to boot ESXi VM with them being attached.
Next step is to upload VMDKs to a datastore with other ESXi VMs, connect to an ESXi via SSH and perform a final conversion to make these VMDKs ESXi-compatible:
vmkfstools -i ce-2020.09.16-stable-pc-home.vmdk esxi_ce-2020.09.16-stable-pc-home.vmdk -d thin
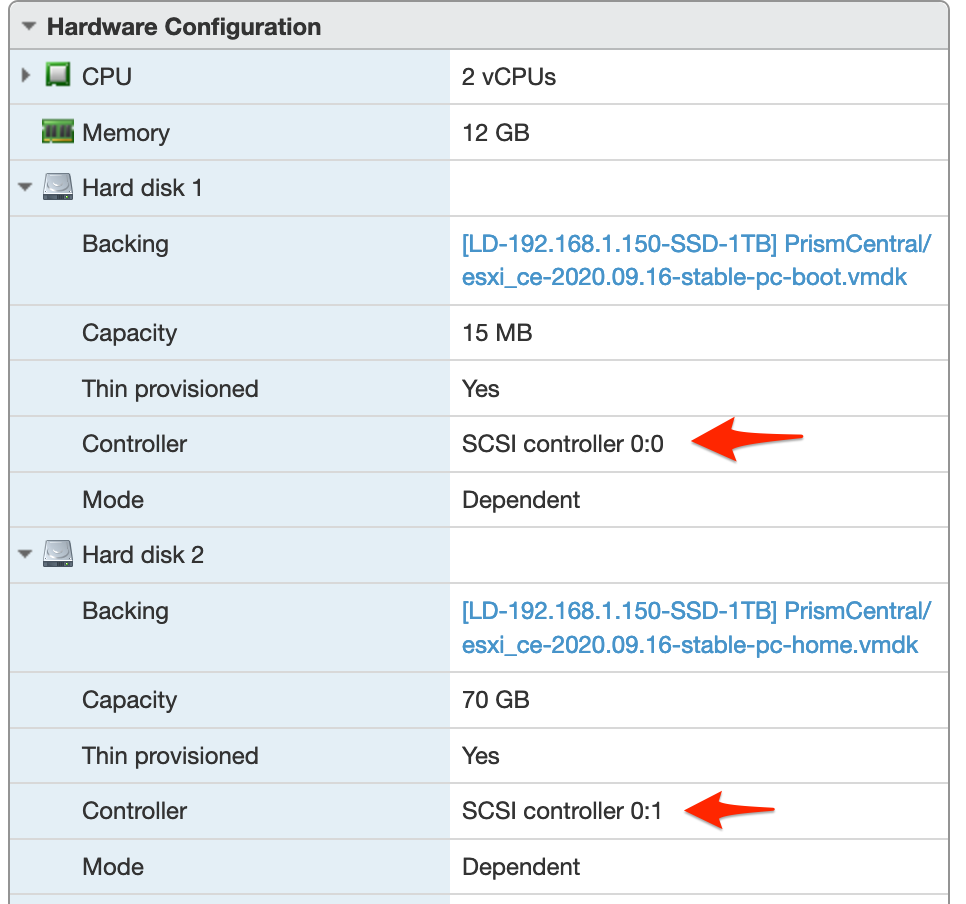
vmkfstools -i ce-2020.09.16-stable-pc-boot.vmdk esxi_ce-2020.09.16-stable-pc-boot.vmdk -d thinNow it’s time to create a new VM (Guest OS version: CentOS 7 64bit, boot: BIOS) and attach “boot” disk to the SCSI controller in 0:0 and “home” disk in 0:1 positions.
At this point I recommend you take a snapshot of the VM and power it on.
Prism Central VM boots to a login prompt rather quickly:
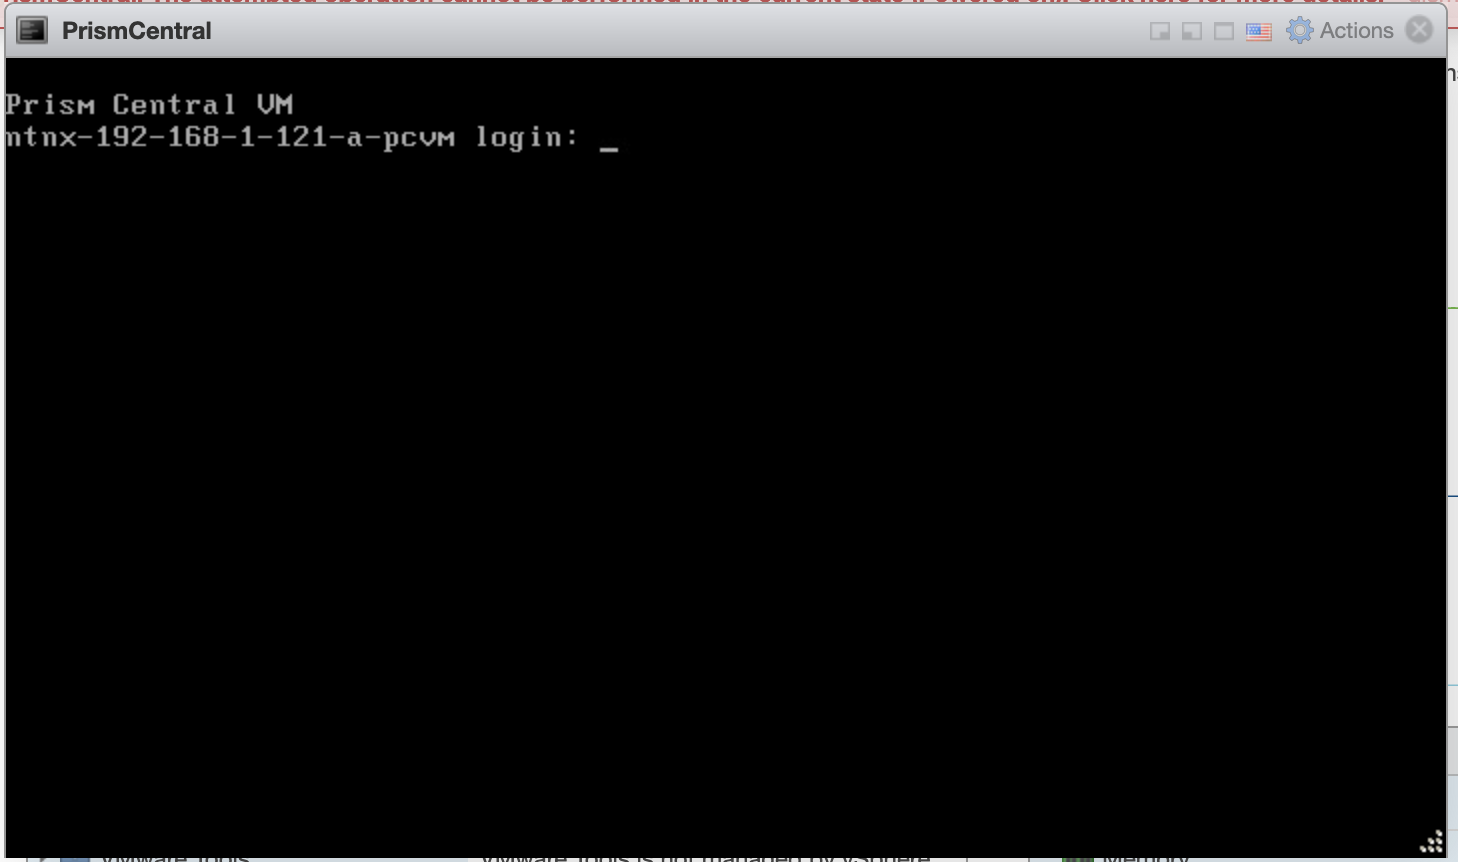
It is my understanding that on the first boot there are some configuration scripts (Cloud-Init) that need to run so I suggest to login with default credentials (nutanix / nutanix/4u) and give the VM a few minutes to finish the configuration.
The following steps are described well in the official Prism Central deployment guide on Nutanix website.
In short you are advised to configure a static IP. The command to edit network configuration:
$ sudo vi /etc/sysconfig/network-scripts/ifcfg-eth0Even though the guide doesn’t say anything about DNS configuration, I would think that it makes sense to specify DNS in the network configuration file as well:
NETMASK=”xxx.xxx.xxx.xxx”
IPADDR=”xxx.xxx.xxx.xxx”
BOOTPROTO=”none”
GATEWAY=”xxx.xxx.xxx.xxx”
DNS1=”8.8.8.8″
DNS2=”8.8.4.4″
Remove the entry in the format “NTNX-<number>-CVM” from /etc/hosts file. And, as suggested in this thread on Nutanix forum, find the cloud-init configuration file and add the following line there:
network: {config: disabled}Otherwise, reboot will revert the network configuration back to DHCP.
Reboot the Prism Central VM:
$ sudo rebootAfter the VM is back, check that it has a static IP and DNS resolution works fine.
Check that Genesis is running and start it if necessary:
$ genesis status
$ genesis start
Time to create a one-node cluster on the Prism VM:
cluster –-cluster_function_list="multicluster" -s *static_ip_of_the_prism_central_vm* createThis should create a cluster and start all cluster services. This is in theory..
In practice this is where it all goes off the rails as some services won’t start and cluster gets stuck in the endless loop trying to start them:
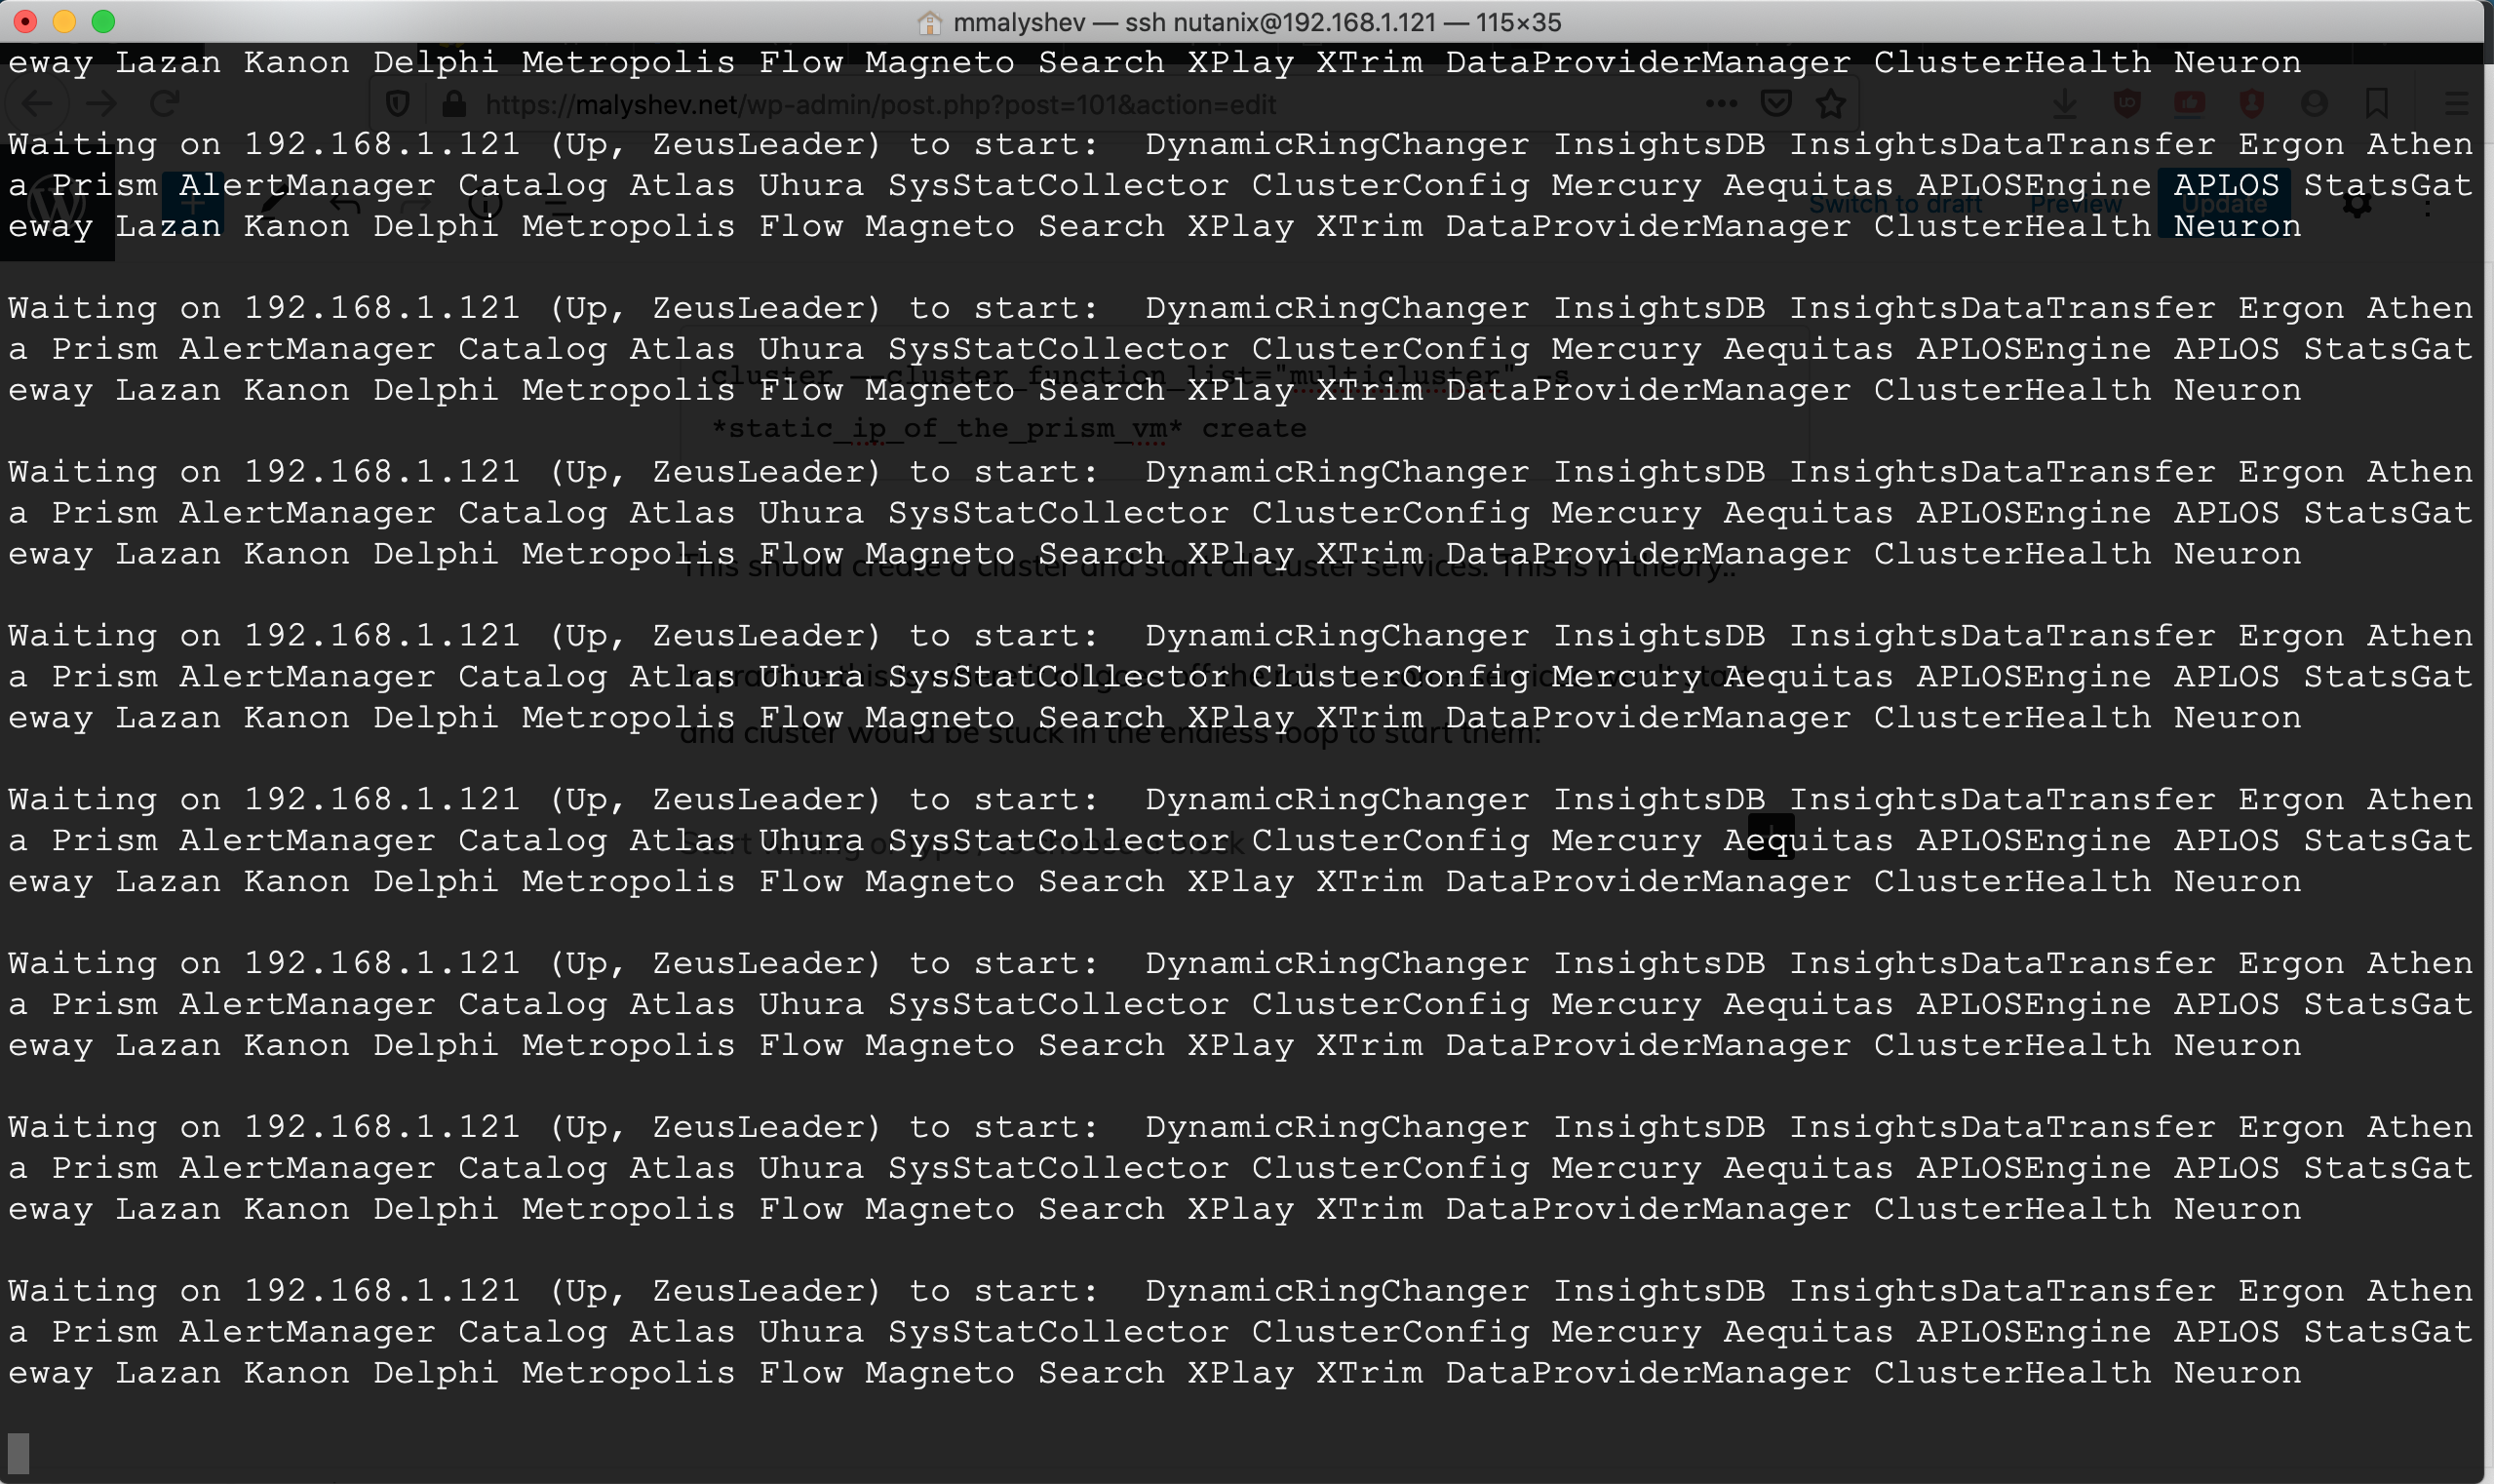
cluster status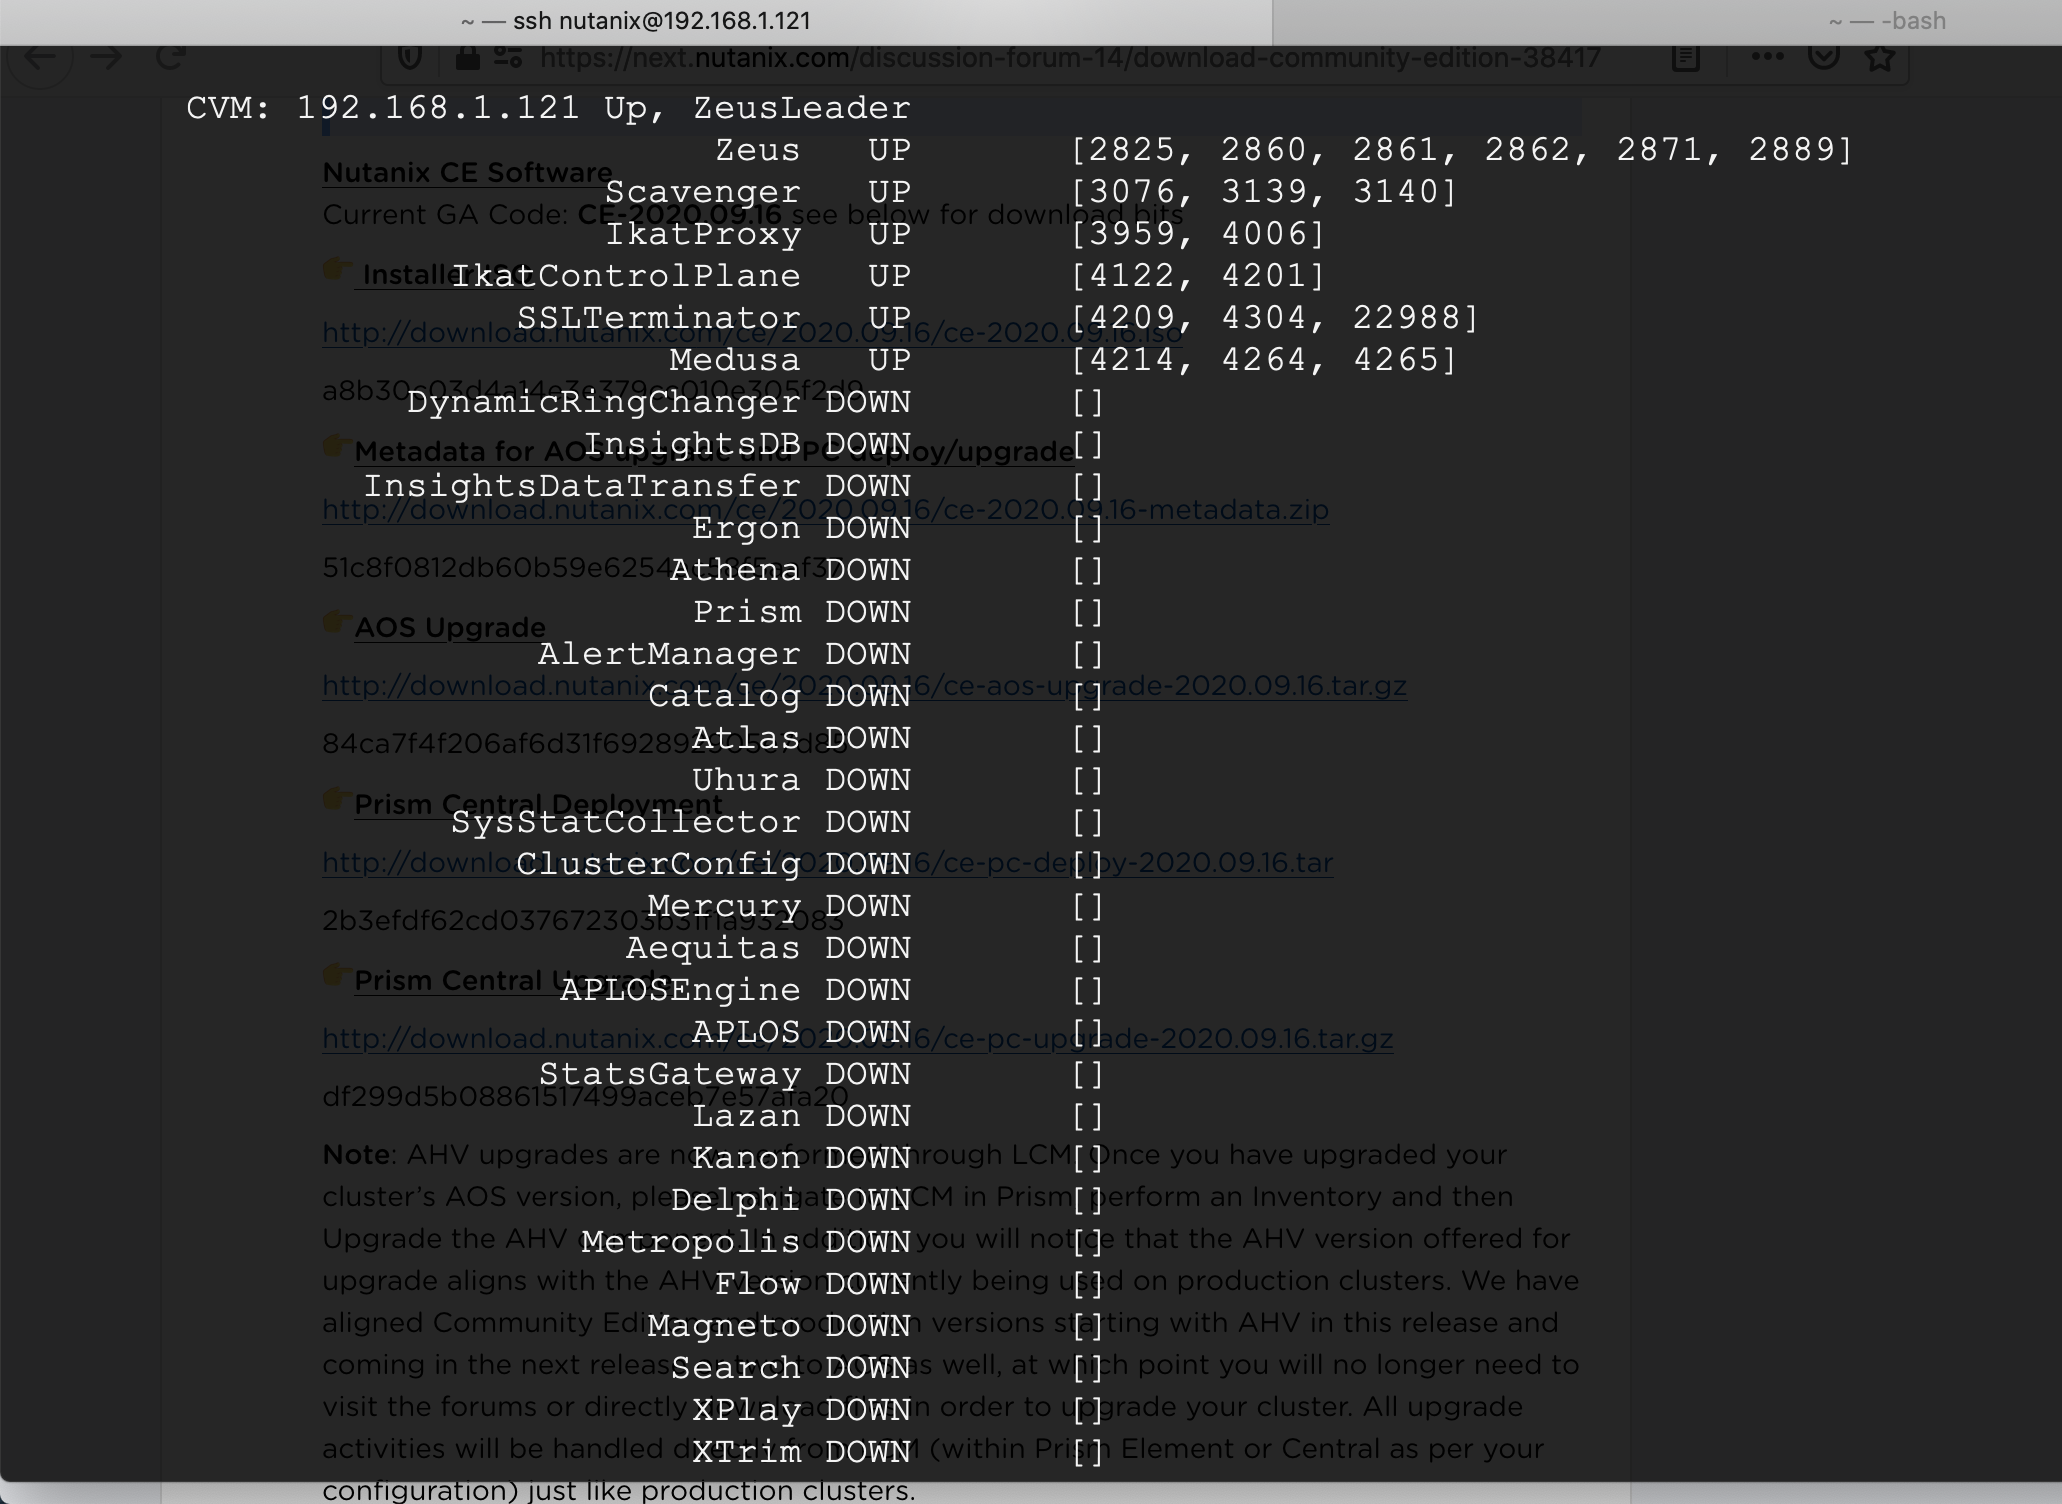
I found two other reports that appear extremely similar to the described issue: one and two. The second report is for some older PC version but the list of broken services seems to be exactly the same.
I looked into log files and found the following error repeating in a loop in /home/nutanix/data/logs/genesis.out file:
2020-11-29 04:19:26,983Z WARNING cassandra_service.py:777 Unable to get the Cassandra token for 192.168.1.121, ret 3, stdout , stderr Error: "Failed to retrieve RMIServer stub: javax.naming.ServiceUnavailableException [Root exception is java.rmi.ConnectException: Connection refused to host: localhost; nested exception is:
    java.net.ConnectException: Connection refused (Connection refused)]" connecting to JMX agent, host: localhost port: 8080
2020-12-05 Update. I tested another version of Prism Central (2020.9.0.1) that can be downloaded and installed directly from Prism Element and I got the same issue. Initially I was thinking that the archive available on Nutanix Community Edition forum was broken but now I suppose that it is probably my homelab setup that PC refuses to work on.
If you can suggest any further troubleshooting step or know the solution, please let me know down below in comments.
Hi there Maksim,
Great article.
pardon my ignorance, but where is the location of the cloud-init configuration file?
/etc/cloud
Good article
https://cloudinit.readthedocs.io/en/latest/topics/network-config.html
Hi Maksim,
I was able to deploy Prism Central, but it took a lot of resources.
1. I deployed a single node cluster in a VMware 6.7 environment (vcsa6.7) on an ESXi 6.5 host.
2. Gave the node 64GB RAM and 12 vPCUs.
3. Prism central is now up and running, and Prism Element (another single node cluster registered)
It appears to be a resource issue, and by the way, I figured out the location of cloud-init.
Hope this helps.